How to use lay flat hose?
How to use lay flat hose? Here we must first check in advance, and then connect the lay flat hose is the keyword of the whole work. If there is no connector, it can also be done by using tape. Today we will explain it in detail.
How to Use Lay Flat Hose: A Simple Guide
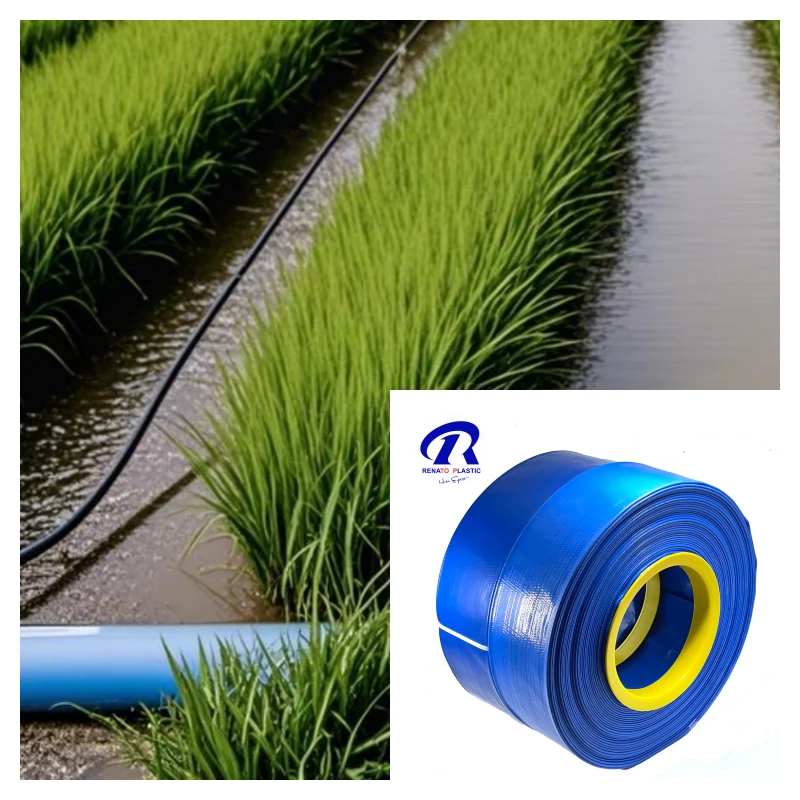
Lay flat hoses are versatile, durable, and easy-to-use tools commonly found in agriculture, construction, and industrial applications. Here’s a simple guide to help you understand how to use lay flat hoses effectively.
What is a Lay Flat Hose?
A lay flat hose is a type of hose that, as the name suggests, lays flat when not in use. Made from strong, flexible materials like PVC or polyurethane, these hoses are lightweight, easy to transport, and can handle high pressure. They are often used for irrigation, water discharge, and even transferring chemicals.

Step-by-Step Guide to Using a Lay Flat Hose
Choose the Right Hose
Before using a lay flat hose, make sure you have the right type for your needs. Consider factors like:
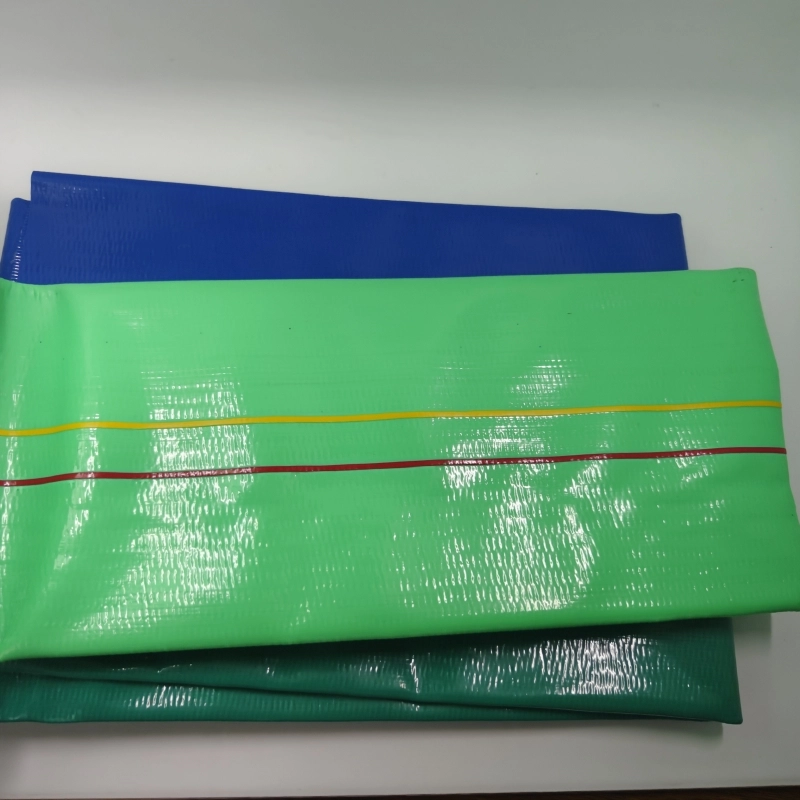
Material: PVC for general water use, polyurethane for heavy-duty applications.
Diameter: Ensure the hose diameter matches your pump or equipment.
Length: Choose a hose long enough to reach your work area but not so long that it becomes unwieldy.
Connect the Hose
Attach to a Water Source: Connect one end of the hose to a water source such as a pump, spigot, or hydrant. Use appropriate fittings to ensure a secure connection.
Secure the Connections: Tighten the clamps or couplings to prevent leaks. Check that the hose is securely attached before turning on the water.
Lay Out the Hose
Unroll the Hose: Lay the hose flat on the ground, ensuring there are no twists or kinks. Straighten out any bends to allow for a smooth flow of water.
Avoid Sharp Objects: Make sure the hose is not laid over sharp objects or rough surfaces that could cause damage.
Turn on the Water
Gradually Increase Pressure: Start with a low water pressure and gradually increase it. This helps prevent the hose from bursting due to sudden high pressure.
Monitor the Hose: Keep an eye on the hose as it fills with water. Ensure it remains flat and doesn’t twist or kink.
Using the Hose
Water Distribution: Direct the flow of water to where it’s needed. For irrigation, position the hose to evenly distribute water across your field or garden.
Adjust Flow as Needed: Use valves or nozzles to control the water flow. This is especially useful for precise watering or when filling containers.
Storing the Hose
Drain the Hose: After use, turn off the water and allow the hose to drain completely. This prevents water from sitting in the hose and causing mold or mildew.
Roll Up the Hose: Starting from one end, roll up the hose neatly. Store it in a cool, dry place away from direct sunlight to prolong its lifespan.
Tips for Maintaining Your Lay Flat Hose
Regular Inspection: Check your hose for any signs of wear and tear, such as cracks or holes. Repair or replace damaged sections promptly.
Keep It Clean: Occasionally wash the hose with clean water to remove dirt and debris that can cause blockages.
Proper Storage: Always store the hose properly when not in use. Avoid leaving it in direct sunlight or exposed to harsh weather conditions.
Using a lay flat hose is straightforward once you know the basics. By choosing the right hose, connecting it securely, and following proper usage and maintenance steps, you can ensure efficient water distribution for your needs. Whether you’re irrigating crops, draining water from a site, or simply watering your garden, a lay flat hose is a reliable and easy-to-use tool.
How to connect lay flat hose?
First, the preparatory work before using the plastic lay flat hose includes selecting the appropriate specifications and models, accurately measuring, and checking whether the pipe is intact and undamaged. After determining the pipe to be used, it is also necessary to prepare the tools and materials required for pipe connection, such as glue, tape, water stop, etc.
The next step is to officially start using the plastic lay flat hose. First, clean the location where the pipe is installed to ensure that it is clean and tidy, free of debris and dust. Then, cut it at the appropriate location according to the design requirements.
When cutting the plastic lay flat hose, you need to use a special pipe cutting tool. The cut pipe should be kept as flat as possible and the edges should be smooth so that a better sealing effect can be achieved in the subsequent connection process.
Next, use materials such as glue or tape to connect the pipes. When using glue, you need to apply it to the connection port of the pipe, then quickly connect the two pipes together and rotate it slightly to ensure that the glue can be evenly bonded.
If you use tape, you need to wrap the tape around the connection port. Note that the tape should be wrapped tightly and evenly to ensure a good sealing effect. When wrapping, you should apply a little force so that the tape can fit firmly on the pipe to avoid water leakage.
For long pipes that need to be connected, you can set up brackets appropriately to ensure the stability and safety of the pipe. The choice of brackets should be reasonably configured according to the length and diameter of the pipe to prevent the pipe from sagging and affecting the normal operation of the fluid.
In some special cases, such as when there is a large pressure or temperature difference at the connection, a water stop can be used to enhance the sealing performance of the pipe. The water stop is usually made of materials such as rubber, has high elasticity, and can play a good sealing effect.
After the plastic lay flat hose is installed, a systematic inspection and trial operation are required. The inspection includes checking whether the connection is firm, there is no water leakage, and whether the pipe is flat. During the trial operation, you can observe whether there is leakage by injecting water into the pipe. If there is no leakage, you can continue to operate it formally.
In the process of using the plastic lay flat hose, you need to pay attention to the following points. First, choose the appropriate pipe material and specifications, and choose according to needs and conditions. Secondly, during construction, pay attention to prevent the pipe from being damaged by external forces, and avoid oppression and direct scratches from heavy objects. In addition, when connecting pipes, you must pay attention to the operating procedures and operating specifications to ensure the firmness and sealing of the connection.
In summary, the use of plastic lay flat hose includes selecting appropriate specifications, accurate measurement, cutting pipes, connecting pipes, setting brackets, using water stop belts, etc. During use, you need to pay attention to material selection, construction precautions and connection process. Through the correct use method and precautions, the normal use of plastic lay flat hose and the safe operation of the system can be guaranteed.
How to Connect Lay Flat Hose with Connectors?
Lay flat hoses are versatile and essential tools in various applications such as agriculture, construction, and industry. Connecting a lay flat hose properly, especially when it comes with connectors, ensures efficient operation and prevents leaks. Here’s a simple, step-by-step guide on how to connect a lay flat hose using connectors.
What You Need:
Lay flat hose with connectors
Compatible fittings or couplings
Hose clamps (if needed)
Water source (pump, spigot, or hydrant)
Basic tools (screwdriver or wrench)
Step-by-Step Guide
Inspect the Hose and Connectors
Check for Damage: Before making any connections, inspect the hose and connectors for any signs of wear, damage, or debris. Ensure that the connectors are clean and free of obstructions.
Verify Compatibility: Ensure that the connectors on your hose match the fittings or couplings on your water source and other equipment.
Attach the Hose to the Water Source
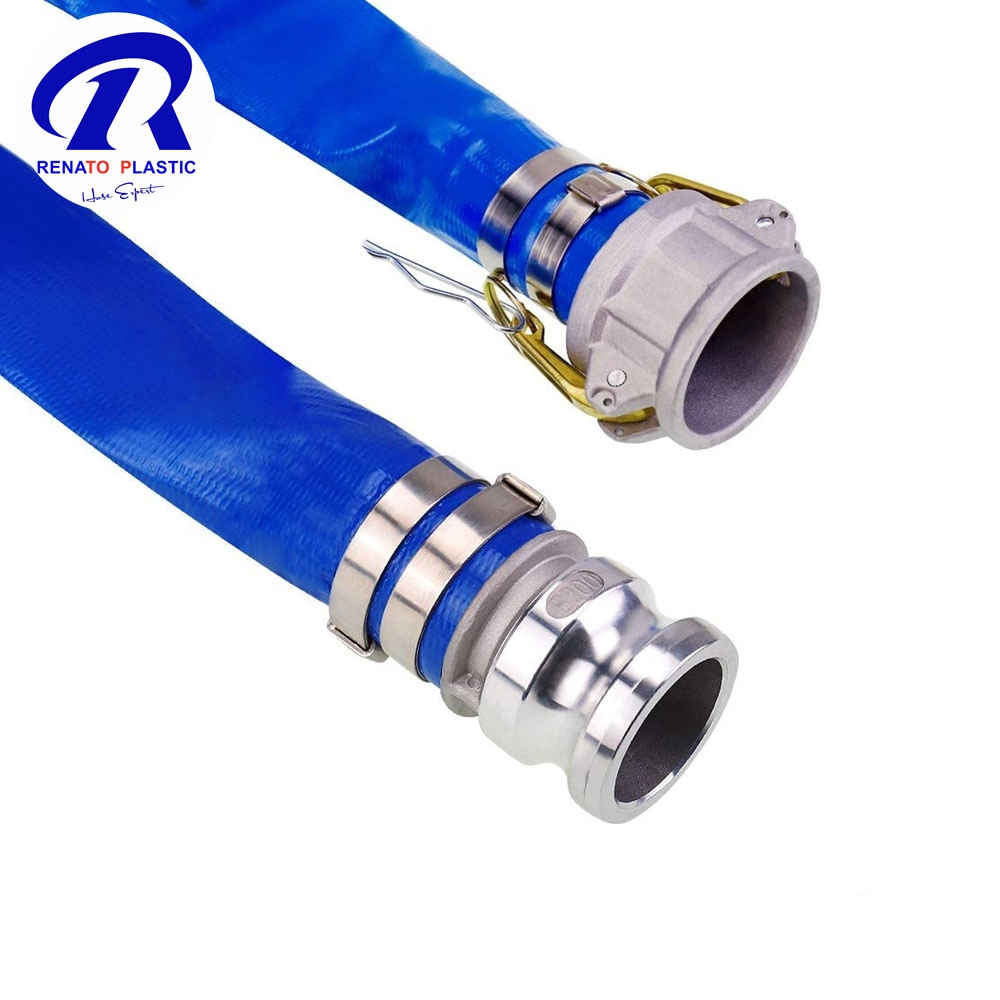
Connect the Female End: Start by connecting the female end of the lay flat hose to the water source. If your hose has quick-connect fittings, simply push the connector onto the corresponding fitting until it clicks into place.
Secure with Clamps: If the connectors require additional securing, use hose clamps. Slide the clamp over the connection point and tighten it with a screwdriver or wrench to ensure a snug fit.
Connect the Other End of the Hose
Attach to Equipment: Connect the other end of the hose to the equipment or area where water is needed. This could be a sprinkler, another hose, or directly to the ground for irrigation.
Ensure a Tight Fit: As with the water source, make sure the connection is tight and secure. Use hose clamps if necessary.
Check the Connections
Inspect for Leaks: Once both ends are connected, inspect the connections for any signs of leaks. Tighten the clamps or connectors further if you notice any dripping.
Test the Connection: Turn on the water at a low pressure to test the connection. Gradually increase the pressure and continue to check for leaks.
Lay Out the Hose
Unroll the Hose: Lay the hose flat on the ground, ensuring there are no twists or kinks. Straighten any bends to allow for smooth water flow.
Position the Hose: Position the hose to direct water flow to the desired area. Avoid placing the hose over sharp objects or rough surfaces that could cause damage.
Adjust and Use
Control the Water Flow: Use valves or nozzles to adjust the water flow as needed. This is especially useful for precise watering or irrigation.
Monitor the System: Keep an eye on the hose during operation to ensure it remains properly connected and free from leaks.
Tips for a Successful Connection
Use Compatible Fittings: Always ensure that the connectors and fittings are compatible with your hose and water source.
Tighten Securely: Make sure all connections are tight and secure to prevent leaks. Using a screwdriver or wrench to tighten hose clamps can provide a more secure fit.
Regular Maintenance: Inspect the hose and connectors regularly for signs of wear and tear. Replace damaged parts promptly to maintain efficient operation.
Store Properly: After use, disconnect the hose, drain any remaining water, and store it in a cool, dry place away from direct sunlight.
Connecting a lay flat hose with connectors is a straightforward process when you follow the right steps. By ensuring all connections are tight and secure, you can prevent leaks and ensure efficient water distribution. Whether you are using the hose for irrigation, draining, or other applications, proper connection and maintenance will help you get the most out of your lay flat hose.